

You can consider this post a small course about Blogger template development. But before moving any further make sure that you have the required skills to create your first template:
- HTML
- CSS
- Javascript/jQuery(Optional to build a interactive webpage)
Now if you know all of these languages, then we are ready to go.
What is a Template?
Before moving any further, first let us define that what is a template? A template is a combination of different sets of elements to build a design of a system. But when it comes to building a web template, then it means are still very similar.
A basic web template consists of a header,content area, sidebar and footer.

Make sure that you remember these things. But wait, there is still on another thing behind the scenes which is very important and that is the <head> section of your website which is not displayed to the user but it is very important.
So first we will discuss about the importance of a template’s <head> section and how to build it?
Creating Blogger Template Head section
As I told you before the <head> section is the most important one. If you are familiar with HTML, then you must already know it. Inside <head></head> tags you store all the necessary information about your website.
For example: meta description, your site’s title, stylesheets’ links, Javascript links and viewport details(We will talk about it later).
You can also store all of your CSS code inside head tags. And you have to do it in blogger. Now let’s start being more practical.
Go to Blogger.com and click on New Blog button. Now put a title and put an address for your blog (i.e. example.blogspot.com) and click on create Blog button.

Now you will be automatically redirected to your new blog. Before doing any thing further, put some articles on your newly created blog.(at-least 10 articles). Make sure that every article has one image.
Or if you do not wish to put so much effort on publishing articles on your newly created blog, then just download this file. And import it to your blog by moving on to your Blogger Dashboard-> Settings -> Other and finally click on Import blog button as shown below:

After clicking on Import Blog button a new pop-up will appear where you will find a choose a file button. Click on it, upload the file which you have just downloaded, check I am not a robot button and click on Import Blog button.
Now go to your blog’s template section, click on Edit Html and delete every single line of code which is inside the code pane.

Now you have deleted your previous template and it is time to create your own one. For that copy the code which is given below and copy it to the your Blogger template editor as shown in the next image.
1
2
3
4
5
6
7
8
9
10
11
12
13
14
15
16
17
18
19
20
21
22
| <?xml version="1.0" encoding="UTF-8" ?><!DOCTYPE html><html xmlns='http://www.w3.org/1999/xhtml' xmlns:b='http://www.google.com/2005/gml/b' xmlns:data='http://www.google.com/2005/gml/data' xmlns:expr='http://www.google.com/2005/gml/expr'> <head> <b:include data='blog' name='all-head-content'/><title> <b:if cond='data:blog.pageType == "index"'> <data:blog.pageTitle/> <b:else/> <b:if cond='data:blog.pageType != "error_page"'> <data:blog.pageName/> | <data:blog.title/> <b:else/> Page Not Found | <data:blog.title/> </b:if> </b:if> </title> <b:skin><![CDATA[ body#layout #widgetID { The Properties For Widget In Layout Page Goes Here } body { background:white; color:black; } ]]></b:skin></head> |

Let’s have a brief description of what we have done right now. First we added a line “<?xml version=”1.0″ encoding=”UTF-8″ ?>”. It tells the browser that we are using XML document.
Secondly, we added “<!DOCTYPE html>” to tell the browser that we are also using HTML5 in this document.
After <head> tag we inserted necessary code including the code which is inside title tags to tell the browser about the site’s title.
Inside <b:skin> tags we will put our CSS stylesheet to design our template elements. We will talk about it about later.
Now your template’s head area is set and it’s time to move further. But do not try to save your template now. Because your template cannot be saved now since it is incomplete.
Developing Blogger template Header section
Now when we have created the head of our Blogger template, it is time to start building the body of your template. For that we need to first create the header of our template. Remember, there is a huge difference between head and header areas.
Inside head area you put information about your site such as site title etc and inside header section you can put your site’s logo or menu.
To build a simple header area of our Blogger Template, we will add the below given code in this existing code :
1
2
3
4
5
6
7
8
| <body><header><b:section class='header' id='header' maxwidgets='1' showaddelement='no'><b:widget id='Header1' locked='true' title='' type='Header'></b:widget></b:section></header> |
As I said before now we are developing our template’s body which consists of 4 major elements(header, content area, sidebar and footer). So we started with the html <body> tag after which we added the <header> section.
Just copy the code exactly how it is and paste it into the already existing code as shown below :

Building Content Area of our Blogger Template
Now when we have created <head> area and header section within body tag, it is time to start developing the most important part of our template which is the content area.
To build it just copy the below given code and paste it into the already existing code as shown in the next image:
1
2
3
4
5
6
7
8
| <article><b:section class='main' id='main' preferred='yes' showaddelement='no'><b:widget id='Blog1' locked='true' title='Blog Posts' type='Blog'></b:widget></b:section></article> |

Now to this point, you should have this code in your template’s code pane :
1
2
3
4
5
6
7
8
9
10
11
12
13
14
15
16
17
18
19
20
21
22
23
24
25
26
27
28
29
30
31
32
33
34
35
36
| xmlns:b='http://www.google.com/2005/gml/b' xmlns:data='http://www.google.com/2005/gml/data' xmlns:expr='http://www.google.com/2005/gml/expr'> <head> <b:include data='blog' name='all-head-content'/><title> <b:if cond='data:blog.pageType == "index"'> <data:blog.pageTitle/> <b:else/> <b:if cond='data:blog.pageType != "error_page"'> <data:blog.pageName/> | <data:blog.title/> <b:else/> Page Not Found | <data:blog.title/> </b:if> </b:if> </title><b:skin><![CDATA[ body#layout #widgetID { The Properties For Widget In Layout Page Goes Here } body { background:white; color:black; } ]]></b:skin></head><body><header><b:section class='header' id='header' maxwidgets='1' showaddelement='no'><b:widget id='Header1' locked='true' title='' type='Header'></b:widget></b:section></header><article><b:section class='main' id='main' preferred='yes' showaddelement='no'><b:widget id='Blog1' locked='true' title='Blog Posts' type='Blog'></b:widget></b:section></article> |
Building your template’s sidebar
We have managed to create the two most important areas of our Blogger template and these are Header section and content area. Now we need to build a sidebar for which we will copy the below given code and will paste it underneath the existing code as shown below:
1
2
3
4
5
6
7
| <aside><b:section class='sidebar' id='sidebar' maxwidgets='' showaddelement='yes'></b:section></aside> |

Now we have also added a sidebar and you can add as many as you like by adding the same code again and again.
Building our template’s footer
Now when the core of our template is built and we have to only add the footer, things are very easy for us. Now if you want to add a simple footer in your template with a copyrights description, then just copy the code which is given below and paste it after all the existing code as shown in the next image :
1
2
3
4
5
6
7
8
9
10
11
| <footer><div class="copyrights" style="clear: both;">Copyrights © 2015 Your blogger template</div></footer></body></html> |

This is a simple footer, you can also add a much more advanced footer with widgets. If you really want to add a footer with widgets, then read this article.
Now save your template and click on view blog button. You must see a very similar web page to this :

Designing your Blogger Template
Now we will start designing our template that we have just created. For that we search for <b:skin> tag in which all of our CSS styling will be saved.
Firstly, we will set our template’s body margin and padding to 0. For that copy the below given CSS code and paste it before ]]></b:skin> tag as shown in the next image :
1
2
3
4
| body {padding: 0px;margin: 0px;} |

Now let’s start designing the header of our template, for that copy the CSS stylesheet which is given below and paste in just before ]]></b:skin> tag :
1
2
3
4
5
6
7
8
9
10
11
12
| header h1 {margin: 0px;}header {padding: 10px 0px;border-bottom: 2px solid #262424;font-family: sans-serif;background: #F2B25C;color: white;text-shadow: 2px 2px 2px black;} |

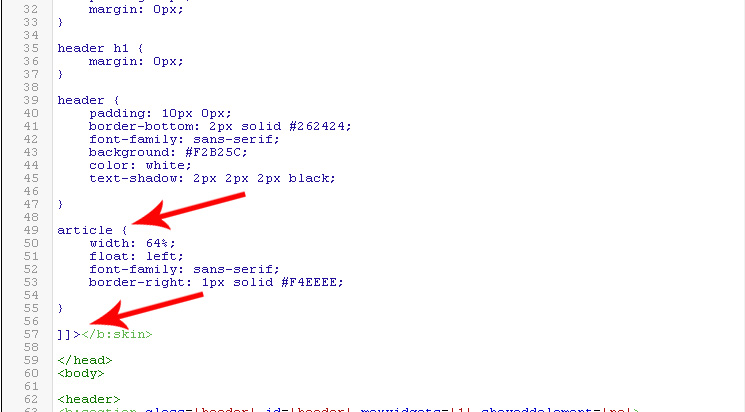
Now let’s design our Blogger template’s article section where all the content will appear. For that just copy the below given CSS code and paste it again just after the before the ]]></b:skin> tag.
1
2
3
4
5
6
7
| article { width: 64%; float: left; font-family: sans-serif; border-right: 1px solid #F4EEEE;} |
It’s time to design our template’s sidebar now, but before that we need some widgets in the sidebar. For that, go to Layout section and add some widgets. I will like you to add a Popular Post widget and few other widgets too as well. Especially, search widget and follow by Email widget.
After that go back to the Edit HTML area and just before ]]></b:skin> tag paste the below given code as shown in the image:
1
2
3
4
5
6
7
8
9
10
11
12
13
14
15
16
| aside {float: left;width: 35%;}aside h2 {background: #262424;font-family: sans-serif;border-bottom: 2px solid #F2B25C;color: white;padding: 2px;} |

Finally, we will design our blogger template’s footer. For that copy the below given code and paste it just before ]]></b:skin> tag.
1
2
3
4
5
6
7
| footer {float: left;width: 100%;background: #262424;border-top: 1px solid black;color: #F2B25C;} |

The Result
We have done some styling of our template. We first designed our template’s header and then content area, sidebar and finally footer.
After doing all that, our Blogger Template should look like this:

Of-course, our template does not look spectacular but at-least we have managed to create a simple template which can be turned into a much more advanced template by doing some useful modifications and additions such as putting up a new menu and by customizing widgets.
You can do as many alterations as you want, but now you know how to build a simple template. So design your first template, and share it with us in comments.


No comments:
Post a Comment